


Hello World,
Happy to write here again. In this blog, let us see how to send push notifications using Onesignal, a push notification service. We are going to build a simple react native app, just to receive notifications.
Firebase setup
For using one signal service, we need two things.
Google server key
Sender ID
To create the above two, we have to create a project in Firebase. Head over to
Create a project in it. Once it is done, move to the settings page. Click on the gear icon near the Project overview then move to cloud messaging. You will probably see a screen as shown below.
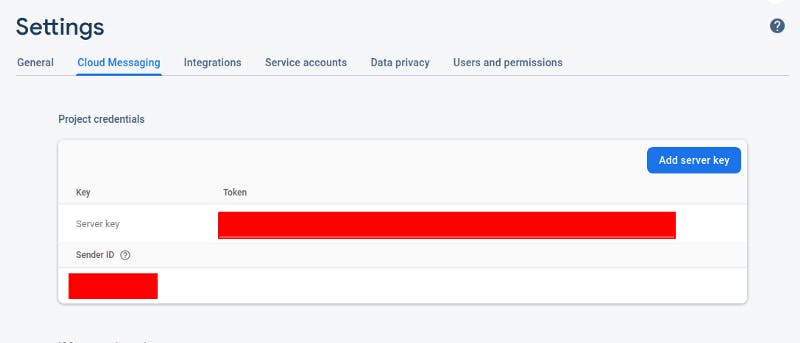
Setting page in Firebase
We can see the Server key and Sender ID from the setting page. We are now done with the Firebase setup.
One signal setup
Now, let’s move to the one-signal setup. Head over to
Create an account on onesignal.com. Once you are done creating an account, you will need to add the app that you are going to create, to one signal. The following steps are to be followed
- One signal will prompt for the Name of the app and the platform that we are going to use. Give a name to your app and select Android on the platform.

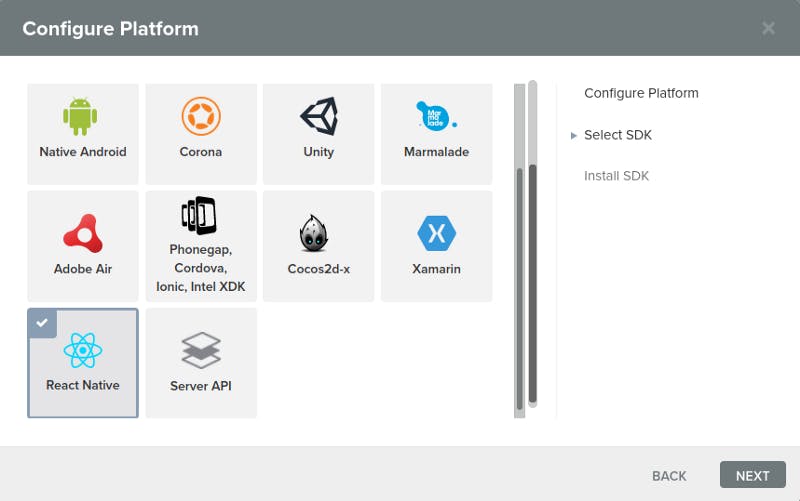
- Next, we will be configuring the platform. We will have to provide the Google server key and Sender Id in the next window.

- Next, we will have to select the SDK. In our case, we have to select React Native in it.
Now we are done with the One Signal set-up.
React Native Setup
Now let’s see how to set up one signal in our code. Before you start, please ensure that you have already installed React Native and NPM in your system. If not install them to proceed.
To create a new project, move to a desired directory/location and open Terminal. Type in the below command
react-native init WhateverProject
This will create a new react native project. Once it is done, install the one signal npm package
npm install react-native-onesignal --save
Next, open the project in any editor. Open the Manifest file, which you can find in
android/app/src/main/AndroidManifest.xml
In the manifest file, we will have to add the following to the activity tag.
android:launchMode="singleTop"
Refer to the below screenshot if you have any doubts.

AndroidManifest.xml
Save the file. Next, open the build.gradle file located in
android/app/build.gradle
In that add the One signal app id and Google sender id in the default config, as shown below
manifestPlaceholders = [onesignal_app_id: "your-one-signal-app-id",
onesignal_google_project_number: "google-sender-id"]
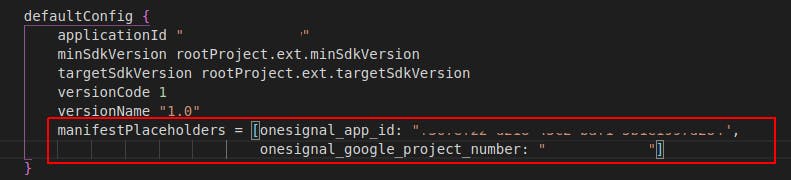
build.gradle file
That’s the setup for React native. Now, let’s run the app. Open two terminal tabs and in the first tab, type the following
react-native start
This will start the server on your machine.
In the other terminal tab, type in
adb devices
This will list the connected android devices/emulators in your machine. It is advised to use physical devices for this case, as in most cases, notification is not received in emulators. Now if you see your device id in the terminal, type in
react-native run android
Once the app runs on your device, you are done with the setup.
Let's push notification
Now, to ensure one signal is working fine, we have to go to the one signal dashboard. Go to the Audience tab on onesignal.com. If you see the count 1 in subscribed users, congratulations! you have successfully configured one signal.
Now, let’s send some push notifications to your device. Head over to the message tab and create a new push notification. Refer below screenshot for sending a push notification.
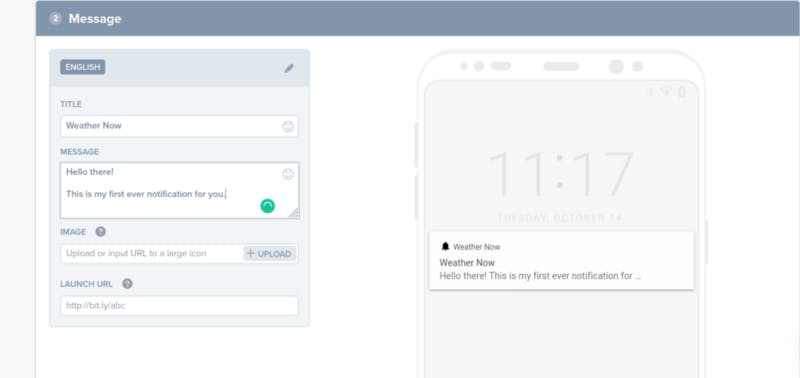
Sending a push notification
Notification received on an Android device
Now you can see notifications received on your device. By default, if you tap on the notification, it will take you to the home page of the respective application. We can also give an external link for the notification. Now we are done with the push notification.
Bonus
A question may arise for you on how to programmatically send push notifications. That is with the react-native code. Here is the solution.
Create a new .js file and add the following code to your project.
export function sendNotification(data, id) {
let headers = {
'Content-Type': 'application/json; charset=utf-8',
Authorization: "Basic '<>'",
}; let endpoint = 'https://onesignal.com/api/v1/notifications'; let params = {
method: 'POST',
headers: headers,
body: JSON.stringify({
app_id: '<>',
filters: [ // Will send notification only to specific device
{ // Optional
field: 'tag',
key: 'Id',
relation: '=',
value: id,
},
],
headings: {en: 'Your Heading'},
contents: {en: data},
url: 'https://something.any', // optional
}),
};
fetch(endpoint, params).then(res => console.log(res));
}
Now we can send notifications by just importing this function and calling it like this.
sendNotification("This notification is from RN code", 1)
Now the notification will be sent to the user with the particular tag, id===1.
This is how we can send push notifications in React native through One signal. I encourage you to explore more about this in one signal documentation so that you can learn more about creating different segments in it.
Thank you!